
Installing and configuring PfSense as a virtual Machine using VMware ESXI.
![]()
Intro:
This is a guide showcasing the installation of pfSense into my VMware ESXI lab environment. After installation and configuration, I will use pfSense as a virtual machine to route all web traffic in and out of my home network. This will replace the router functionality of my Netgear AC1900, and will allow me to use the Netgear AC1900 as a simple wireless access point to connect my wireless devices.
In a separate post, I will create VLANs for all categories of traffic on my network and then segment the traffic with firewall rules.
This is a great learning experience, and can help you to learn about routing protocols and virtual networking. This is not my first time using pfSense, I previously had a virtual pfSense server configured as my primary firewall/router, however I was having a lot of issues with the USB NIC’s that I was using, so I decided to get a dedicated quad port PCIe NIC.
I am currently running ESXI on an OptiPlex 7010 (16GB of RAM w/ a 2TB HDD), with a Quad port Gigabit NIC (HP NC364T). This whole setup can be had relatively inexpensively. If you want to copy my setup, you can scour eBay for a good deal for the PC and NIC.
Networking Planning:
A wise man once said, “By failing to prepare, you are preparing to fail”, so taking these wise words to heart, I used a program called yEd Graph Editor to map out my network’s topography. I am a visual learner, so this helps tremendously when configuring and installing network devices.
Everything you see here is not yet in place, but I hope to add on to my network little by little until it looks like this. As you can see by the color schema, I will have three physical network connections and several virtual and wireless connections. My desktop will be connected directly to the management network, this will ensure that I always have a route to my ESXI server.
(Right Click and Open in New Tab for Full Resolution)

Download/Install pfSense:
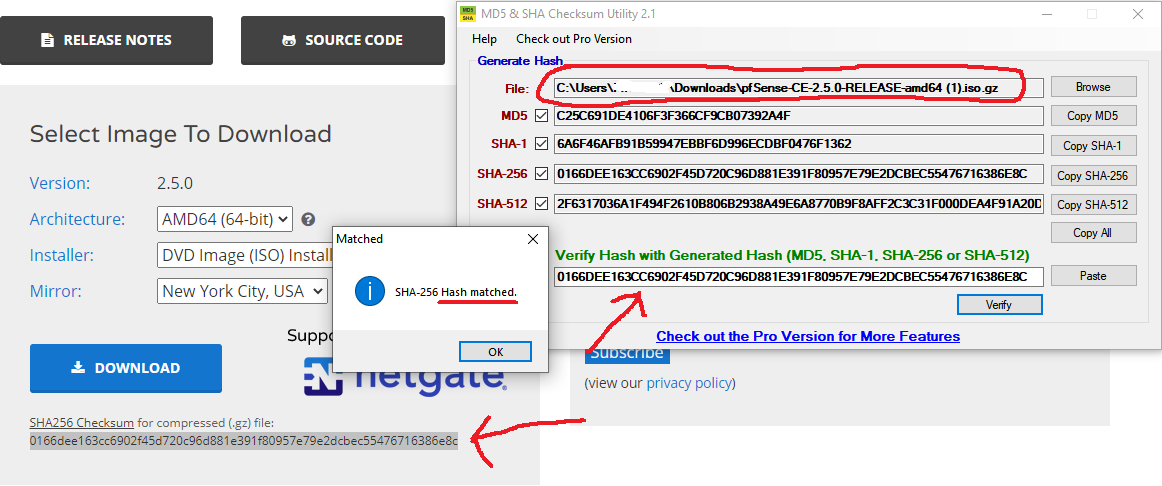
The next step is to download pfSense. It’s best practice to verify the zip file’s checksum to ensure that no integrity has been lost in the upload/download process. This can be done using the command line, or you can install a program like “MD5 & SHA Checksum Utility”.
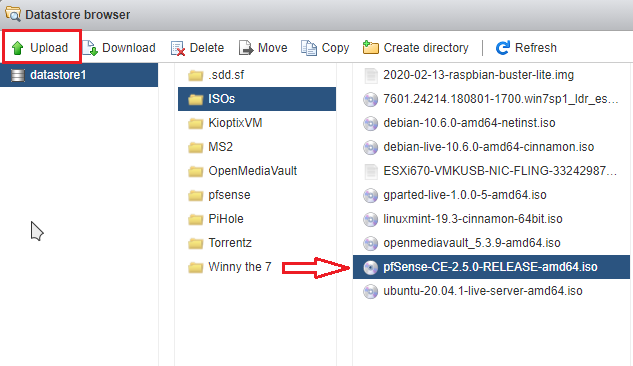
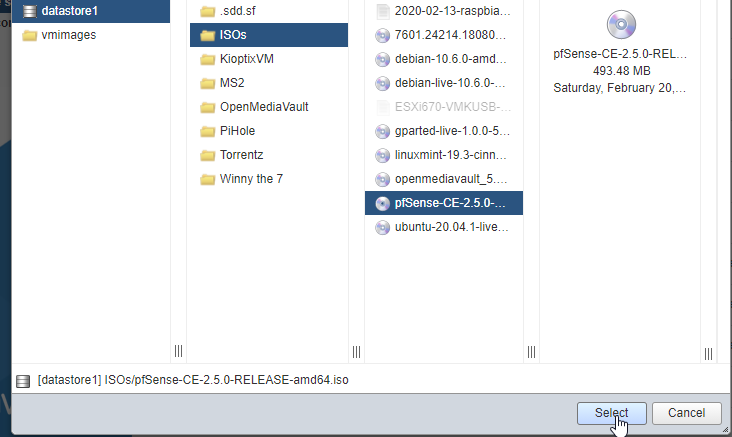
After I have the ISO downloaded and verified, I unzip the ISO, navigate to the ESXI datastore, then upload the ISO file to the datastore. I find it helpful to create an “ISOS” directory on the datastore to store uploaded ISO files.

Virtual Switches:
Next, we will be configuring the virtual switches and port groups of the ESXI server to use as WAN and LAN uplinks for our pfSense VM. For my installation, the only device on my management network (LAN) will be my desktop PC.
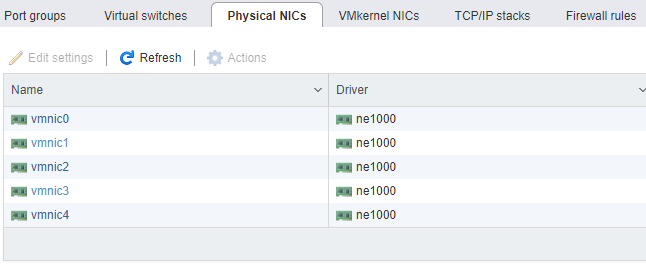
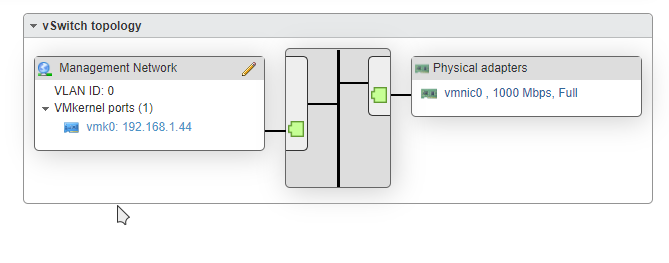
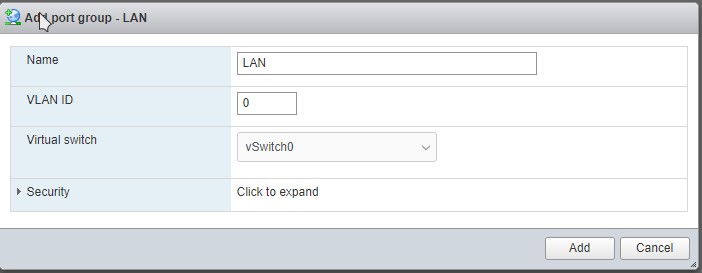
Vmnic0 is already configured as our management network (LAN) on vSwitch0, so all I need to do is add a virtual port group to use in my VM.

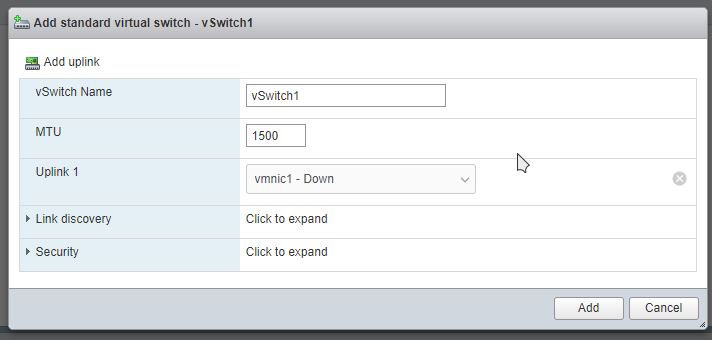
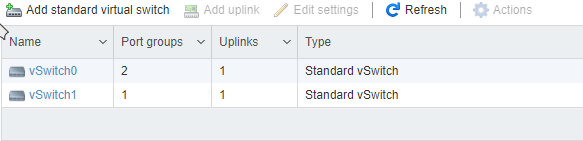
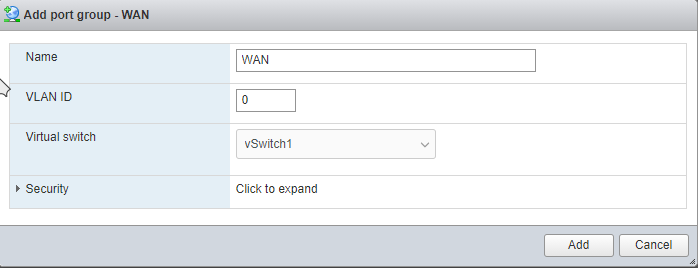
Next is the port group for my WAN, I will create a virtual switch and a port group the same way I did for the LAN, but this time I will be using a different physical NIC for the virtual switch, in my case this is vmnic1 & vSwitch1.
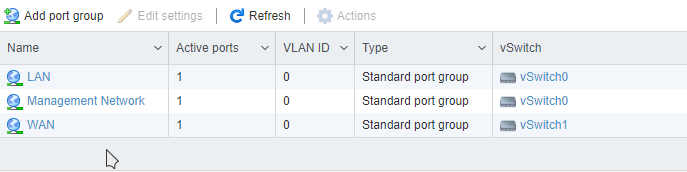
Now I am done with configuring the virtual network for now, let’s move onto creating the PfSense VM and connecting the uplinks.
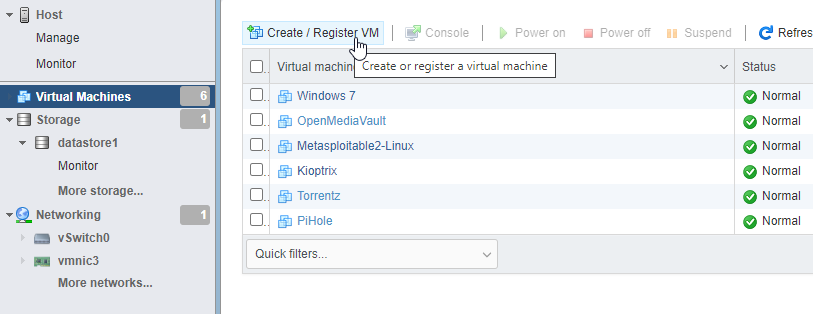
Virtual Machine Creation:
Navigate back to the virtual machines tab, then open the “Create/Register VM” wizard.
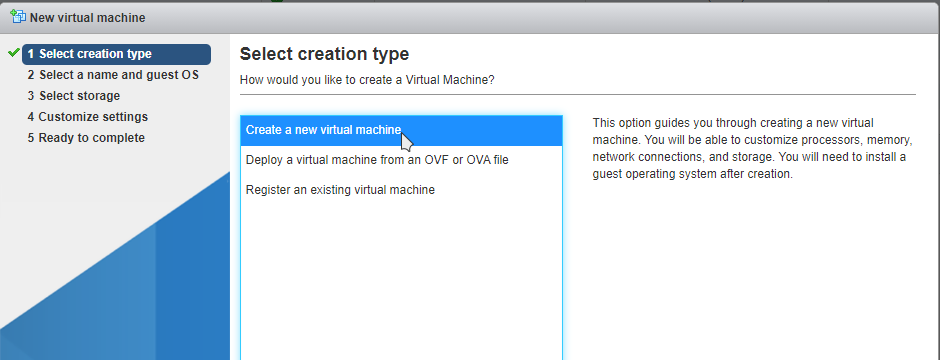
Select “Create new Virtual machine”, then hit next.
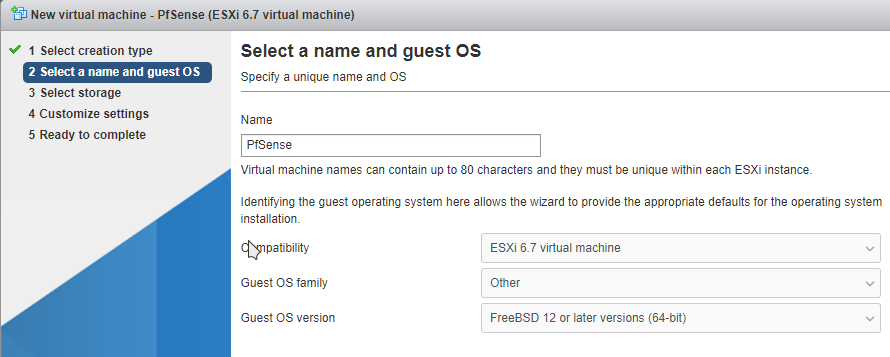
Enter a name for your new PfSense machine. In my case I will just name it PfSense (It doesn’t really matter what you name it). Select the Version of ESXI that you are using, in my case, I am running ESXI 6.7. The OS Family is “Other”, and the Guest OS Version is FreeBSD 12 (64-bit) since I’m installing version 2.5.
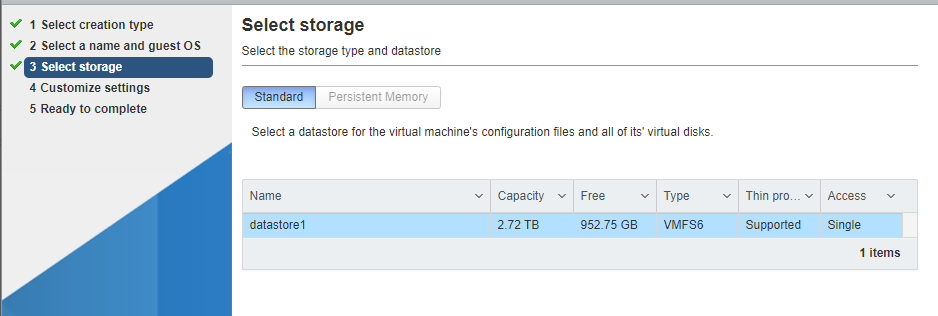
Select the datastore you want to use for storage. Then hit next.
The next step is allocating VM resources. You want to scale your resources based on your deployment. If you head to the PfSense website and view their products, it will give you a sense of what hardware requirements are needed for all types of deployments.
In my case, I will be installing this as my home router/firewall so it won’t require much. The default settings are sufficient in my case. While I am here, I will go ahead and choose LAN as the first network adapter and then add a second network adapter which I will choose as WAN from the dropdown menu.
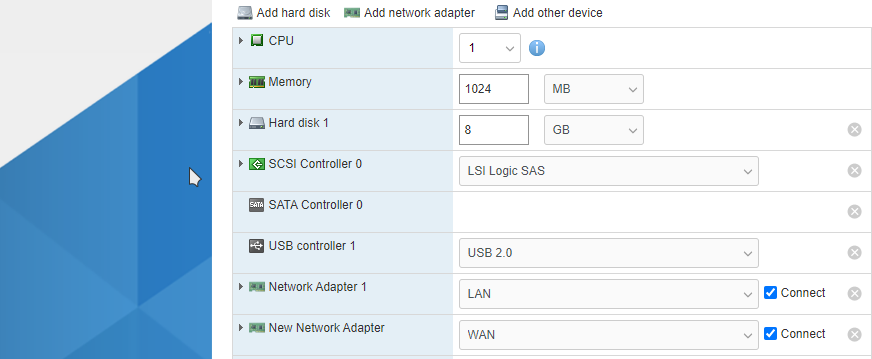
Also, I will mount the PfSense ISO to run at first startup.

Hit “Next”, then review your settings. If everything looks good, hit “Finish” to complete the VM setup.
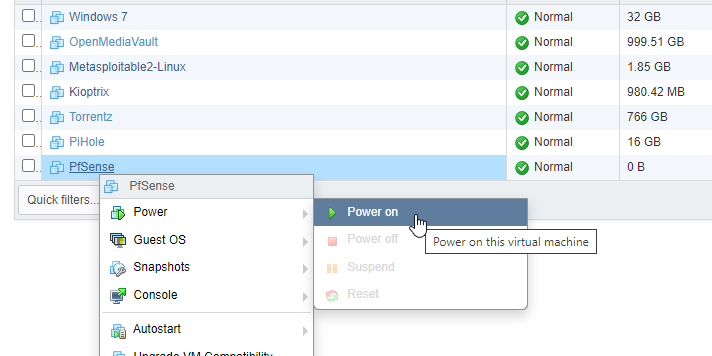
Find your newly deployed VM in your virtual machine list, right click it, then power it on.
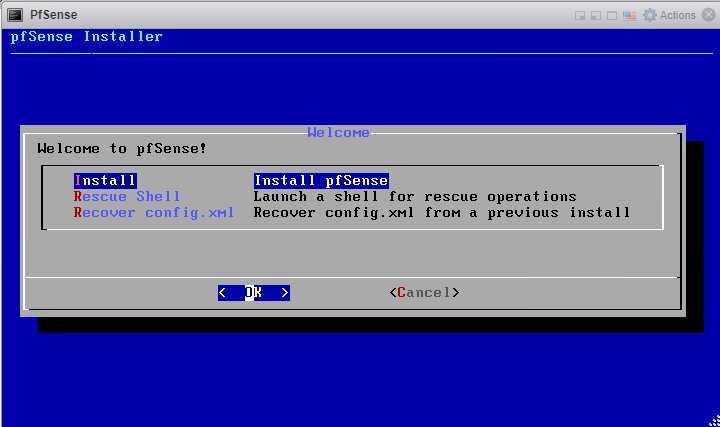
Select your language.
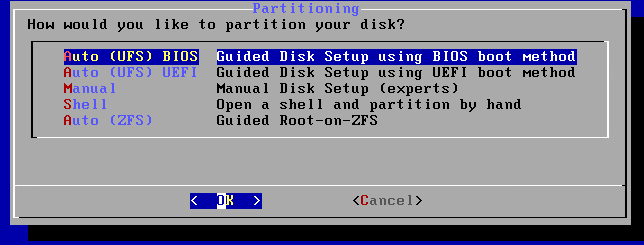
When you get to the partitioning screen, select “Guided Disk Setup using BIOS boot method”. Let the Installer do its thing.
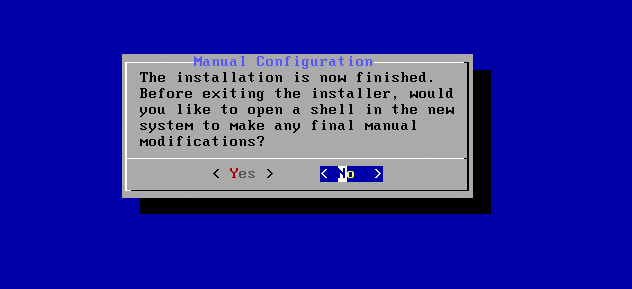
At this screen select “no”.
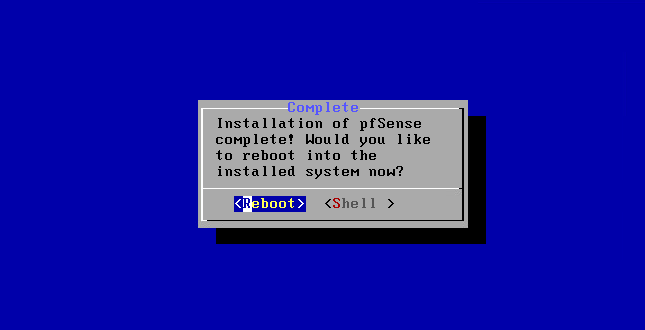
Reboot the system.
When it’s done, it will autoboot you into the default configuration prompt. We aren’t setting up VLAN’s at this point so type “n”.
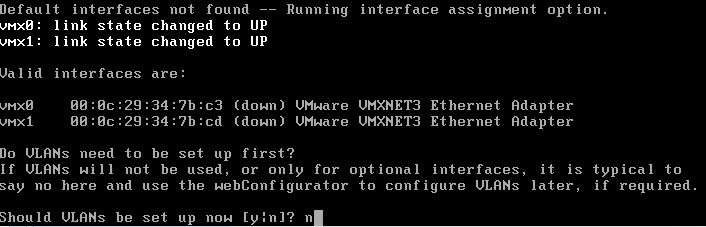
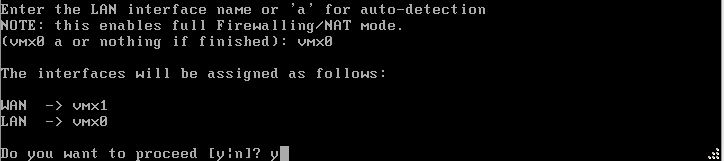
If you remember from earlier, my WAN interface is vmx1 and my LAN interface will be vmx0. It may have a different naming convention in your case, but the concept is the same.


Routing:
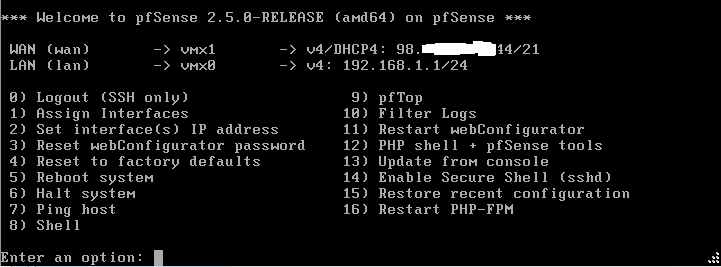
After the machine gets through setting your configurations, you will be greeted with this screen. There’s so much that we can change here, but I will keep everything default as of now. Don’t worry about the WAN address for now, I will explain that in a few.
The only thing left to do now is to connect my PC’s LAN cable to the MNGMT port on the back of my server and the WAN port to the uplink from my modem.
As the network readjusts and configures itself you may find yourself without an internet connection. Wait a few minutes and your ESXI interface should come back up if you are using the same IP schema.
If you changed IP schema, you have to search for the IP address of ESXI using something like Angry IP scanner or simply connect a monitor to your ESXI machine and the IP address should be on the home screen. Also, you may have to disable/re-enable your PC’s NIC to get your IP to change, or do an ipconfig /release, ipconfig/renew.
If your modem is annoying like mine, you may have to reset your modem to get a WAN IP.
Web Interface:
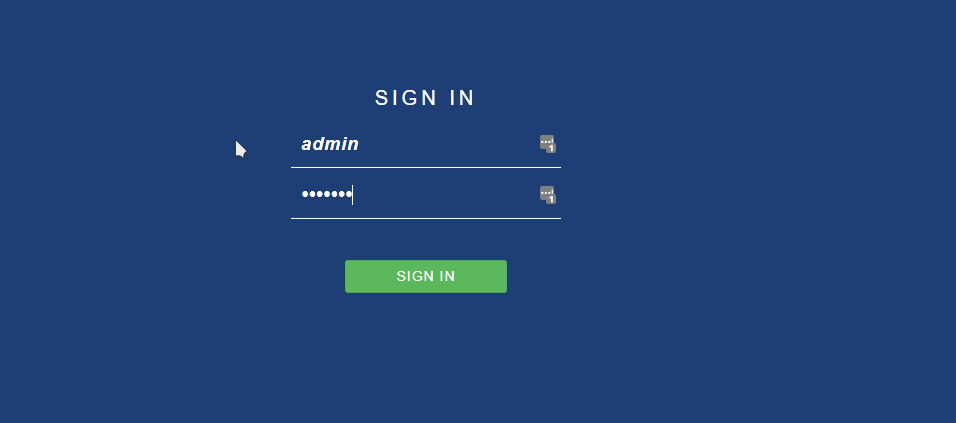
Now we can navigate to our gateway’s IP address, in my case the address is 192.168.1.1. If you enter this address into your web browsers URL, you should be greeted with a login interface. The default username is admin and the default password is pfsense.
Hit next a few times and you will get to the router’s general Information screen. As you can see, my Hostname is PfSense and my Domain is M0d.com, configure this as you wish. In this instance I will be using Google’s DNS servers. Popular DNS addresses are Google’s (8.8.8.8/8.8.4.4) and Cloudfare’s (1.1.1.1).
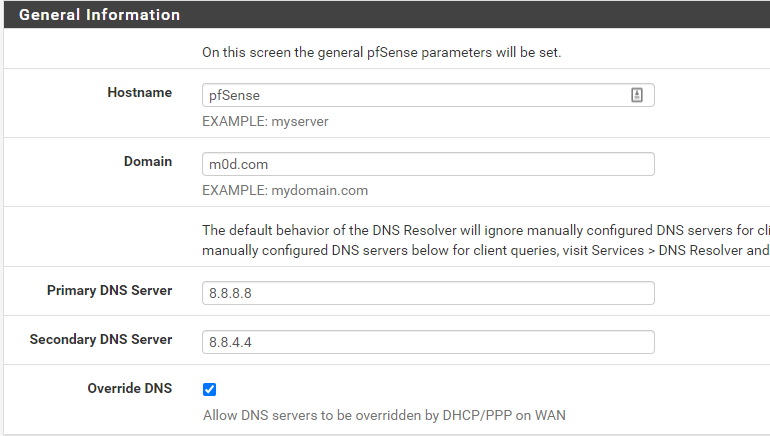
Read more about DNS here:
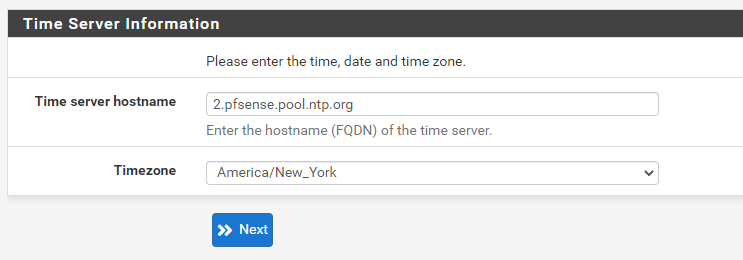
You can leave the Time Server hostname as default, but change the Time zone to match where you live.
Hit Next on step 4 unless you know what you are doing.
Since I will be keeping the default IP schema, I hit next on Step 5 as well.
Step 6: Change the Admin password!! Kudos to PfSense for making this mandatory during the installation process. This ensures that you don’t leave the default admin credentials in place, which is a BIG no no.
Step 7: Hit “Reload to reload PfSense with your new changes.”
Step 8: Wait for your router to reload.
Step 9: Check for updates. It’s important to keep your servers up to date. Companies release security and quality patches all the time to keep your machines safe and running smoothly so be on the lookout for those. Since we are on the latest version there is nothing to update, but better to be safe than sorry.
You should be greeted with the wonderful PfSense dashboard as we are finally finished with our deployment!!!
Wooo!

Hopefully you have successfully completed setting up PfSense as a VM. Take a moment to pat yourself on the back, breathe a breath of relief, then get ready for the next step (coming soon)!! Feel free to go out and research things to install onto your Hypervisor that may interest or be of benefit to you.
I suggest you go check out these resources:
Leave a like or a comment if this post helped you in some way or if you learned something in the process.
“The ability to create is a blessing!”