BTLO - [Easy] Ben
Tools:
EML Viewer - Free tool to view EML files without Outlook Express
GitHub - Rurik/Noriben: Noriben - Portable, Simple, Malware Analysis Sandbox
Additional Resources:
| [SANS Institute | Looking at Mutex Objects for Malware Discovery and Indicators of Compromise](https://www.sans.org/blog/looking-at-mutex-objects-for-malware-discovery-indicators-of-compromise/) |
Q1) Submit the subject line of the phishing email (Format: Subject String)
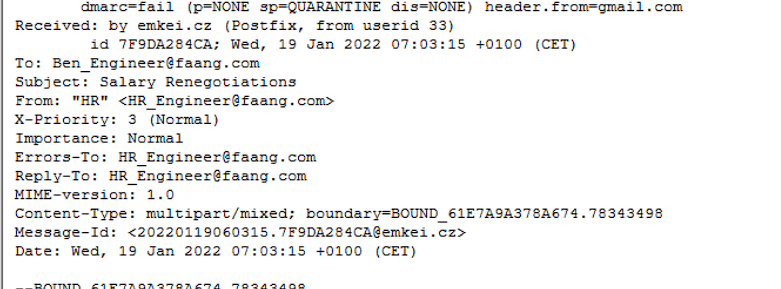
Open Kernel EML Viewer then navigate to the .eml file in the ‘CollectedEvidence’ folder. Scroll down until you get to the content of the email.
Q2) Submit the FROM and TO addresses of the phishing email (Format: FromMailbox@domain.tld, ToMailbox@domain.tld)
See Image from Q1.
Q3) Submit the download link observed in the email attachment (Format: https://www.domain.tld/path/something)
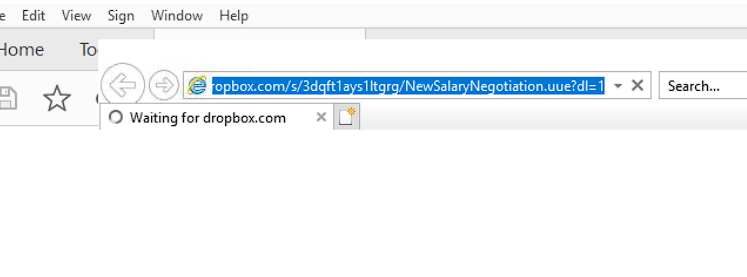
Open “Know the New Salary Negotiation Process.pdf” with adobe acrobat and hover over the giant ‘Download’ button. Since this is a non-internet connected analysis VM, we can just click the link and copy/paste from Internet Explorer.

Q4) Submit the extension of the file that will be downloaded when the malicious link is clicked (format: .extension)
The answer is in the URL of the answer to the previous question.
Q5) Submit the Mutex used by the malware sample (Format: {mutex})
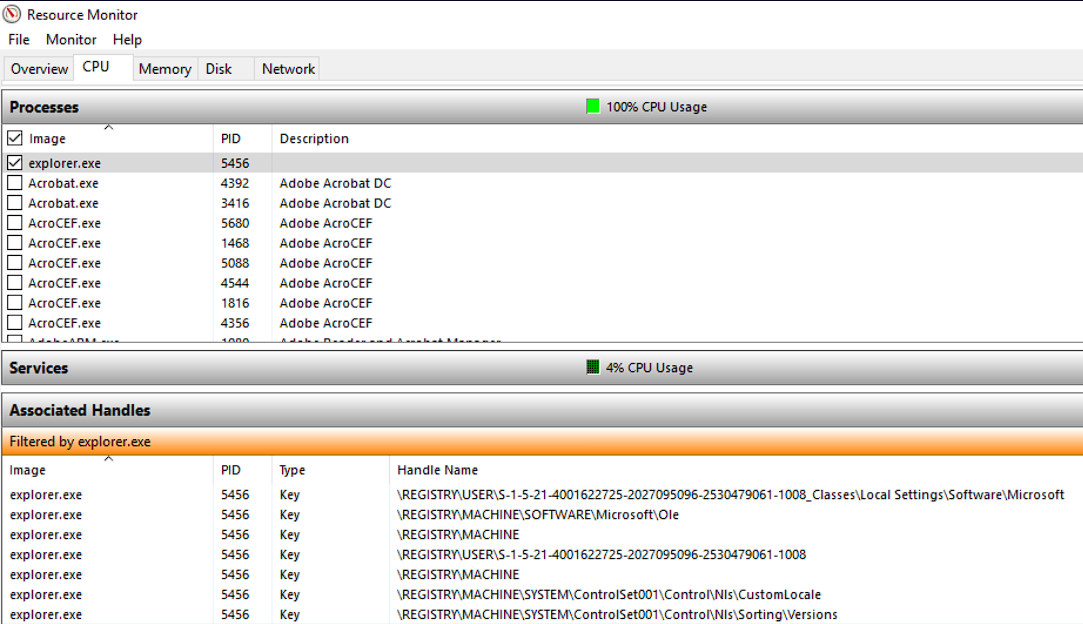
To answer this question you have to run the malicious executable file (SalaryNegotiationProcess.pdf.exe) and open resource monitor > CPU > Associated Handles dropdown to find the mutex object name.
| More info on Mutex Objects: [SANS Digital Forensics and Incident Response Blog | Looking at Mutex Objects for Malware Discovery and Indicators of Compromise | SANS Institute](https://www.sans.org/blog/looking-at-mutex-objects-for-malware-discovery-indicators-of-compromise/) |
Q6) The malware replicated itself in two locations to maintain persistence. Submit both locations according to the timeline - so submit the first file then the second file (Format: C:\path\file.ext, C:\path\file.ext)
Extract ‘NewSalaryNegotiation’ from ‘NewSalaryNegotiation.uue’ located in the “CollectedEvidence”. Open ‘NewSalaryNegotiation’ and rename ‘SalaryNegotiationProcess.pdf.exe’ to ‘SalaryNegotiationProcess.exe’ (this step may be optional, I just didn’t want any naming conflicts when running Noriben).


Now open a terminal with admin priviledges, navigate to Norbien.py, and run Noriben on the malicious executable to perform Dynamic analysis on the program. You may have to restart your lab instance (terminate then spin up new instance) if procmon won’t run.
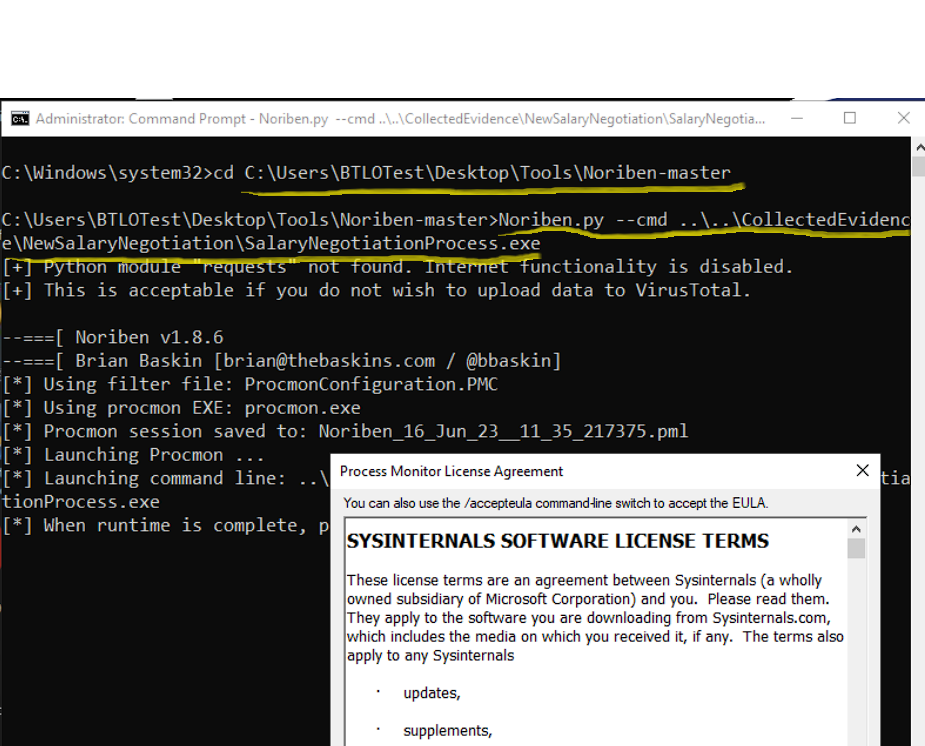
Let procmon run for a few minutes then navigate back to the terminal and kill the process with CTRL + C and the report should be saved and opened.

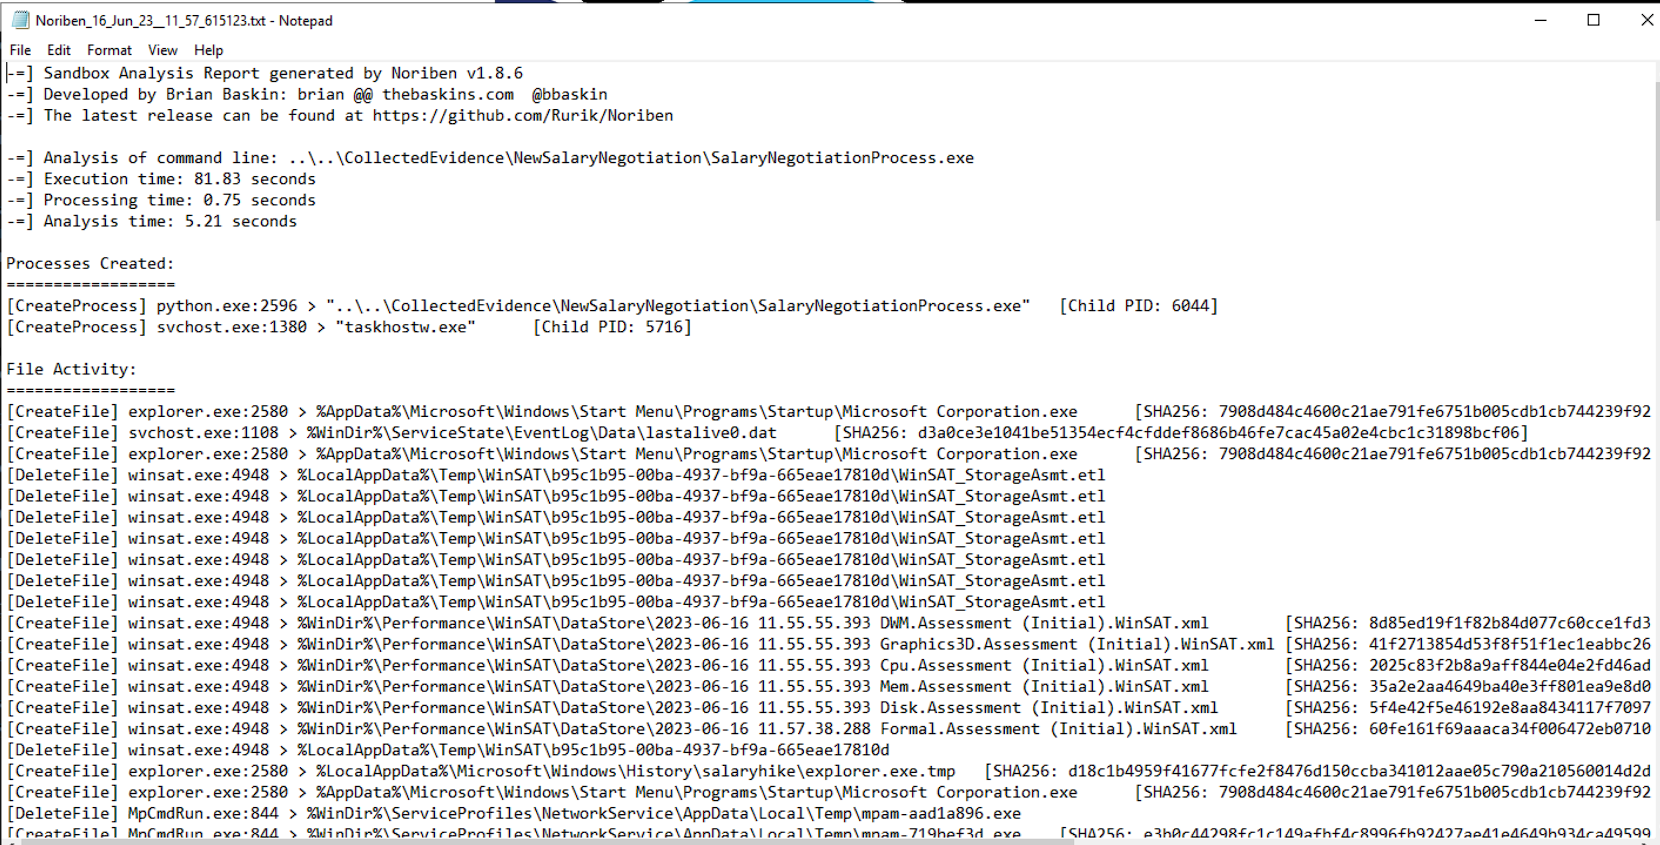
In the report, we see file creation activity right out of the gate.

We also see a registry value set with a path to another executable.

Q7) Name of the file created by the malware sample to store recorded keystrokes from the victim machine (Format: filename.extension)
We can see multiple writes to a certain file. This is the file created to record the user’s keystrokes.

Q8) Submit the command-and-control server IP address, and the port used for communication (Format: X.X.X.X:Port)
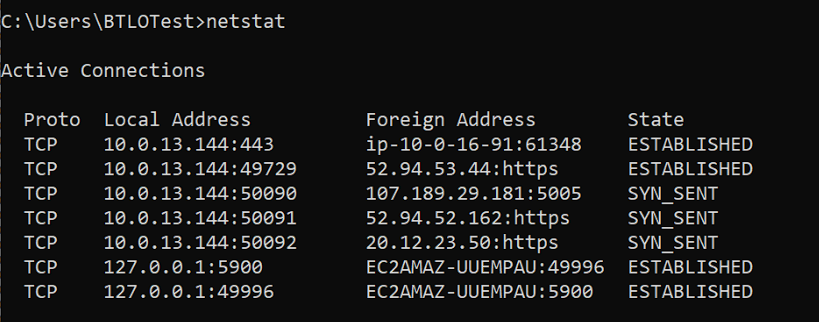
Since the malware is active on this analysis machine (we ran the executable in Q5) we are able to see the network connections that the executable are making by using the ‘netstat’ command on our host. One of these is an outlier. Do IP lookups on abuseipdb.com to figure out which one belongs to the malware.
